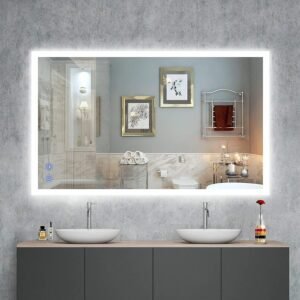
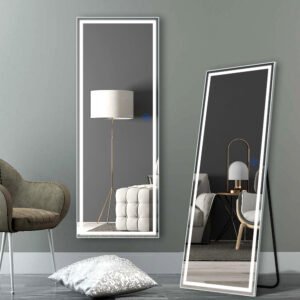
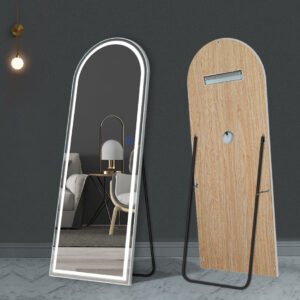
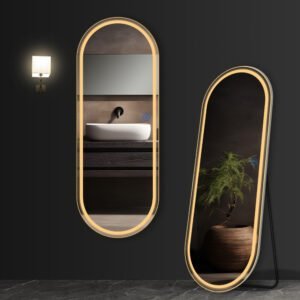
It might seem overwhelming to install an LED mirror, with all the wiring and technical details. Don’t worry! With the right steps, anyone can install an LED mirror in their bathroom, chambre à coucher, ou espaces commerciaux. I’m here to break it down for you and make it easy.
Correctly LED mirror installation instructions, start by choosing the perfect location, ensuring the wall type can support the weight of the mirror, and connecting the electrical supply carefully. Proper installation ensures the mirror functions well and is safe to use, offering both aesthetic appeal and practical lighting.
Now that you have an overview of the steps, let’s look at each step in detail. I’ll break down the entire process for you, and by following these instructions, you’ll be able to install your LED mirror like a professional.

Table des matières
BasculerProper LED Mirror Installation: Key Steps to Follow
To properly install an LED bathroom mirror, you need the right plan, preparation, and tools to get the job done correctly. Here’s how.
Choosing the Right Location: The first thing to consider is where you want to install the mirror. For salles de bains, it’s usually best to place the mirror above the sink because it offers excellent lighting for grooming and putting on makeup. In other rooms like a bedroom or down a hallway, you can place the mirror wherever it looks best and provides the lighting you need.
Think about how you’ll use the mirror, too. If you want to use it for putting on your makeup, you’ll want to put the mirror at a height where you can easily see your face. Be conscious of glare as well. Don’t install the mirror where it will reflect a window or other strong light source.
Check the Wall Type: Before you start putting the mirror on the wall, check and see what kind of wall you’ll be drilling into. Depending on the wall, you’ll use different methods to mount the Miroir lumineux LED. Drywall, Par exemple, needs wall anchors to hold the weight of the mirror. If you’re drilling into concrete or brick, you’ll need masonry screws. Knowing the type of wall helps you know what tools and screws to buy.
- Drywall: When it comes to drywall, you’ll use drywall anchors. Drywall anchors are necessary to ensure that your mirror stays attached to the wall where you want it. The drywall isn’t strong enough to hold heavy objects on the wall by itself. Wall anchors work by inserting them into the holes you’ve drilled. Alors, when you screw into the anchors, the screws hold the mirror to the wall.
- Concrete or Brick: With concrete or brick, you’ll use masonry screws or anchors. These screws are designed to penetrate and grip hard surfaces like concrete and brick.
Position the Mirror: After you’ve selected the location, grab a measuring tape. Measure to be sure you’re putting the mirror up at the right height. In a bathroom, it’s nice to have a mirror at eye level. You don’t want it too low or splashed with water from the sink, either. A good rule of thumb is to put the mirror 5–6 inches above the top of the sink.
If you’re putting it in the center of a space, measure the space to make sure it’s centered. Then use a level to make sure it’s perfectly straight.

What Tools Are Needed to Install an LED Light Up Mirror?
Before you get started, make sure you have the right tools. These tools will help you mount the mirror securely and connect the power supply correctly.
Essential Tools for LED Mirror Installation:
- Power Drill
You’ll need a power drill to make the holes in the wall for the Miroir de vanité conduit. Be sure to use the correct size drill bit for your wall type. In drywall, use a drill bit that matches the size of your wall anchors. For masonry, you’ll need a masonry drill bit. Go slow, so you don’t crack or damage the walls.
- Level
The level is an essential tool to make sure your mirror hangs level. You don’t want a mirror hanging on the wall that looks crooked because it will drive you crazy. Aussi, be sure to put the level on the mounting frame of the mirror and not on the glass. The frame is more likely to be perfectly straight.
- Screwdriver
You’ll need a screwdriver to screw in the screws that will hold the mounting brackets or the mirror in place. Some LED backlit mirrors come with a pre-attached frame, while others require you to assemble the frame separately. If your mirror comes with a mounting bracket, you’ll use the screws to secure the bracket to the wall first, and then the mirror will be placed on the bracket.
- Measuring Tape
Use a measuring tape to find the perfect position for your mirror and make sure the mirror is centered on the wall where you want it. This will help you have symmetrical spacing if you’re putting up more than one mirror or make sure your single mirror is in the perfect spot.
- Electrical Tools (if needed):
If your LED miroir de salle de bain rétro-éclairé has to be wired directly into the power supply, you’ll also need electrical tools. Depending on the size of the job you’re doing, you might need wire cutters, wire strippers, and electrical connectors. Always remember to use caution when working with electricity. If you’re uncomfortable working with electrical currents, call an electrician. Safety first!

How to Mount an LED Mirror Securely on the Wall?
Properly mounting the LED mirror is crucial. Here’s how to mount the mirror.
- Measure and Mark the Mounting Spots:
Use your measuring tape to measure to find the perfect position for your mirror. Then mark the spots where you’ll need to drill the holes for your mounting screws. Use a level off your marks to make sure you’re marking even, so the mirror will be straight. If your mirror comes with a mounting bracket, measure and mark where the bracket will be. Si vous avez un full-length mirror without a frame, the mirror itself may have pre-drilled holes that you can use as guide marks.
- Drill the Holes:
Using your power drill, carefully drill holes into the wall where you made your marks. Be sure you’re using the right size drill bit, depending on whether your wall is drywall, concrete, or brick. In drywall, it’s a good idea to drill into the studs in the wall. This will provide a more secure hold for your mirror. If you’re drilling into masonry or brick, you’ll use masonry screws instead.
- Insert Wall Anchors (if necessary):
If you’re installing a mirror on drywall, you’ll insert wall anchors to help support the weight of the mirror so the screws won’t pull out of the wall over time. If you’re working with more solid materials like concrete, you’ll use masonry screws instead. To insert the wall anchors, simply push them into the holes and then screw them in place. You might need to use a rubber mallet to tap them in lightly to make sure they’re flush with the wall.
- Secure the Mounting Brackets:
Si votre Miroir LED comes with a separate mounting bracket, screw the bracket into the wall by screwing it into the anchors or wall plugs you used. Tighten the screws to make sure the bracket is good and snug. If your mirror doesn’t come with a bracket, you’re going to screw it to the wall directly by screwing it into the mounting points on the back of the mirror.
- Hang the Mirror:
Once the mounting brackets are secure, hang the mirror on the brackets. Tighten any screws or bolts that are needed to hold the mirror in place. Step back and look at your mirror. Is it hanging straight and where you want it?

How to Connect the Power Supply for LED Mirrors?
If you have to wire your LED light up vanity mirror into your power supply, then you’ll want to pay attention to these next steps. If your mirror just plugs into the wall, you can ignore this section.
Wiring the LED Mirror:
Turn Off the Power: Before you do anything, turn off the power to the area you’ll be working in. This will keep you from getting shocked. Believe me, you don’t want to get shocked by anything.
Prepare the Wiring: Cut the wires to the right length and use wire cutters to strip the insulation back from the ends of the wires. You want to be sure that the copper is exposed and that the wires are ready to connect securely.
Connect the Wires: Connect the live and neutral wires from your mirror to the corresponding live and neutral wires in your wall. Use wire connectors to make a tight connection. Deusre to connect the wires correctly. The live wire is usually black, so that will connect to the black wire in your electrical box. The neutral wire is usually white. It will connect to the white wire in your junction box.
Secure the Ground Wire: Some mirrors will also have a ground wire. It’s usually green or copper. If your mirror has a ground wire, connect it to the ground screw or ground wire in the electrical box. This helps keep you from getting shocked and keeps everything safe.
Test the Power: Once you have all the wires connected, turn the power back on from the circuit breaker. Flip the switch or touch the sensor to test out the mirror and make sure the LED lights come on like they’re supposed to.

What to Do if the LED Mirror Does Not Turn On After Installation?
If your LED illuminated mirror doesn’t turn on once it’s installed, you may have a problem with the wiring or the power supply. Here’s what to check.
Troubleshooting Tips:
Check the Power Source: Make sure your mirror is actually connected to live power. If you wired it into your electrical system and it’s not coming on, check the circuit breaker and make sure it’s not tripped.
Check the Wires: Make sure everything’s connected and nothing is loose. If wires are loose or something’s not connected properly, your mirror won’t work.
Check the Fuse: If your mirror has a fuse, see if it’s blown. If so, pop that fuse out of there and get a new one just like it.
Get in Touch with the Manufacturer: If you’ve tried these things and you still can’t get your mirror to come on, it’s probably defective. At that point, it’s time to contact the manufacturer and see about getting your mirror replaced.
Résumé
Follow these instructions, and you’ll be able to set up your LED mirror with no problems. Whether it’s for your bathroom, chambre à coucher, or some other space, a well-installed LED mirror adds beauty and functionality to your room. Make sure it’s connected to power, make sure it’s mounted correctly, and enjoy your cool new lighting!


